Table Of Content
I knew I needed room for hanging clothes, room for folded clothes, and lots of shoe shelves to get all of our shoes under control. My wire shelving was constantly falling apart and I was always afraid it was going to rip out of the wall (despite being secured to the studs). I could not wait to replace the wire shelving with a custom closet!
14 Best Closet Systems of 2024 TIME Stamped - TIME
14 Best Closet Systems of 2024 TIME Stamped.
Posted: Thu, 28 Mar 2024 07:00:00 GMT [source]
Buy your own drywall anchors
Each DIY custom closet will have its own design and assembly, but the basic steps stay the same. Not just the closet organizer, you can also bring in accents and color to the walls with color, stencils, decals, or wallpaper. Hang wallpaper for a fresh take on a closet and to create an eye-catching backdrop for your things. Choose a neutral shade for a subdued look or a colorful pattern that pops.
DIY Floating Closet Organizer
Wardrobe Hanging Ideas on Sale - Atlanta Progressive News
Wardrobe Hanging Ideas on Sale.
Posted: Sat, 27 Apr 2024 14:57:05 GMT [source]
Close up holes created by the screws with wooden buttons to ensure a clean finish. The type of closet and the size are two big contributors to how much you’ll spend on the building process. You can expect to spend around $200 to $1,500 for a reach-in closet, while a walk-in option can cost between $1,000 and $3,000 to complete. Then measure the closet interior and go shopping for closet organizers. We outfitted our closet with off-the shelf Melamine components available at home centers and lumberyards.
DIY Built-In Closet
Attach the studs to the walls with construction adhesive and toggles or by nailing to an existing stud. When you use toggles, hold the 2×4 in place, drill the toggle locations (about 2 ft. apart with a 1/4-in. bit through both 2×4 and drywall). Then remove the 2×4 and drill the drywall with a 5/8-in. Mount the toggles to the 2×4 (Photo 4), spread the adhesive, and shove the toggle wings through their holes.
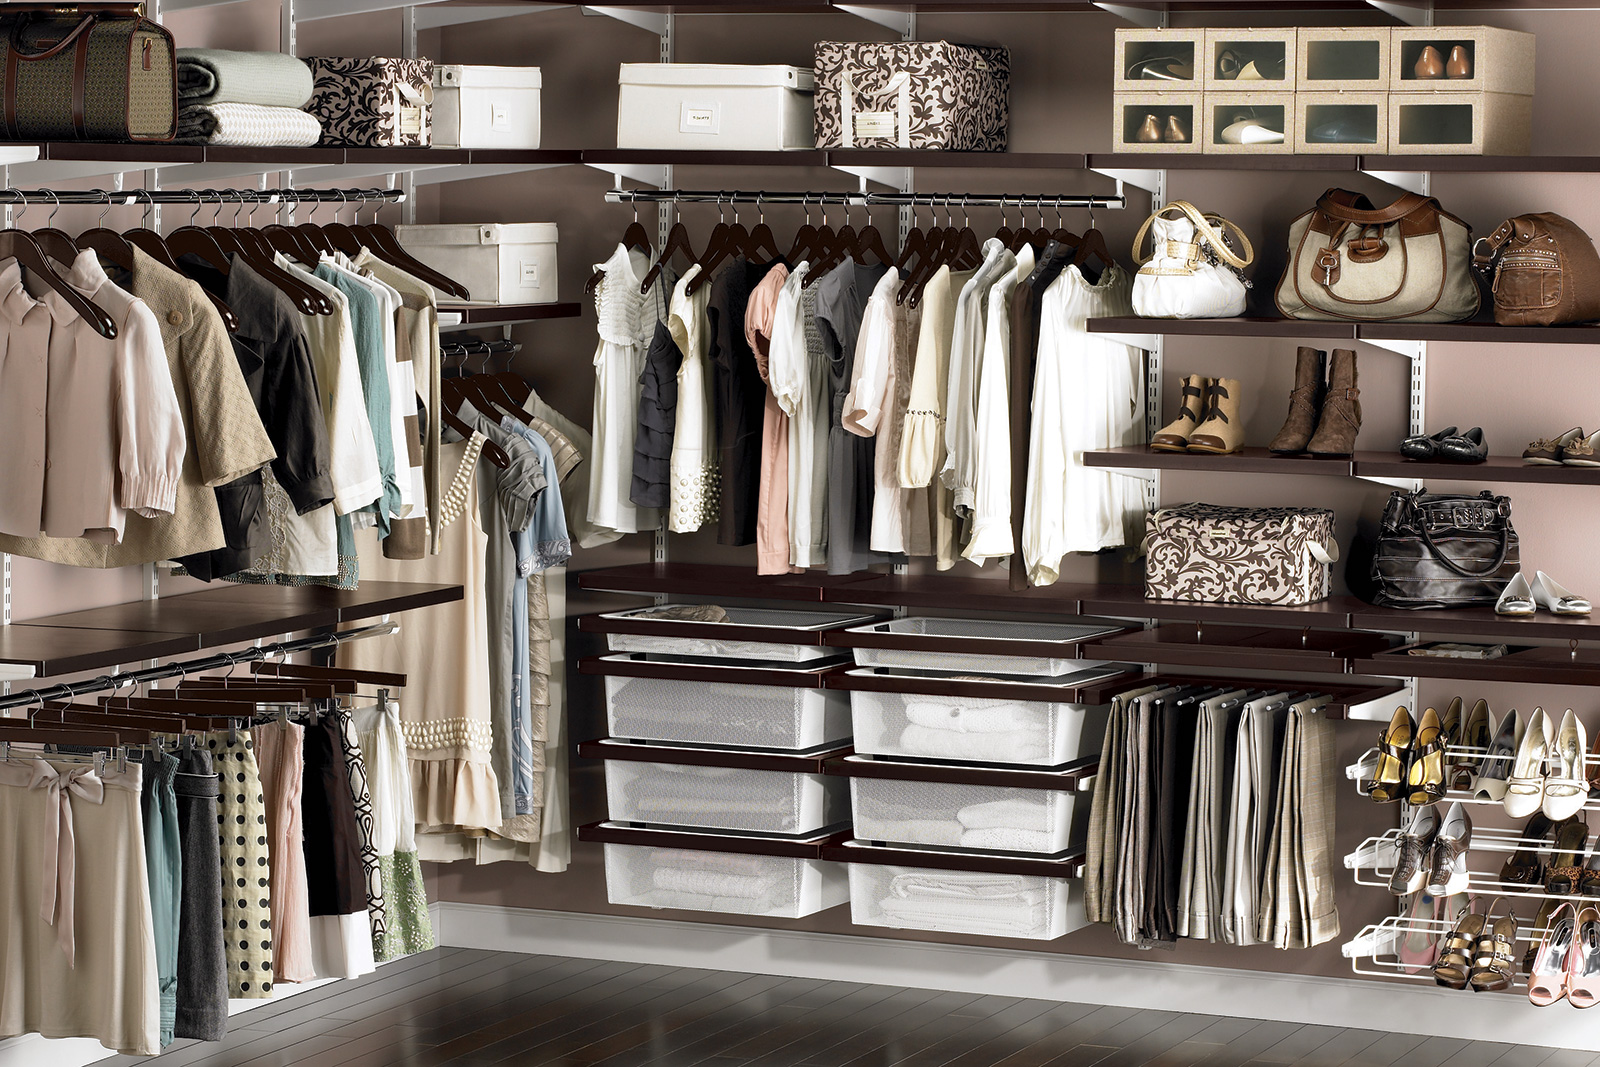
As your child grows, reconfigure the space to fit larger clothes, and use the storage cubes and bins elsewhere. It’s important to plan and determine what your specific needs are. The best way to create a functional walk-in closet is with a modular closet system that you can set up according to your needs. They’re available as wood closet organizers or wire closet systems. Some wood shelves can be cut to fit your space, making it even easier to customize your closet. If you're adding a closet tower, solid wood towers and ventilated wood closet towers must be wall mounted, but other systems can be on the floor.

Every custom closet installed by Closets by Design is based on one of four floor-based closet storage systems (Brio, Everyday, Classic, and Regency). This floor-based design allows the finished closets to have full-size doors, deep panels, and large drawers for maximum functionality and stability. Designing a closet to be both stylish and functional takes some planning. If you have a lot of dresses, skirts and pants or prefer to hang your blouses and sweaters rather than fold them, choose an option that offers more hanging rods than shelves. If you fold more of your clothing and store more things in baskets and bins, incorporating more shelf space is the way to go. You might want to think about creating a space that allows for the room to do that.
How to build cheap and easy DIY closet shelves
It’s basically the same concept as how to frame a wall with a door. An energetic beginner could complete it successfully in about four weekends. You probably don’t need a building permit for the closet, but if you add closet lighting you’ll need an electrical permit.
Choosing the Right Wood and Materials
Closets need some airflow and dehumidification or they become breeding ground for mold, mildew, even insects. A bathroom-size fan, timed to go on and off at regular intervals, will help pull air through the closet even when the door is shut. A small dehumidifier is another way to keep things from getting musty, especially if the closet is in a damp basement. When hiring a contractor for your closet construction, you should apply the same caution as you would when paying for a bathroom remodeling or other costlier home improvement projects. If a walk-in closet doesn’t appeal to you or you can’t find space for it, you should consider the reach-in option.
Cubbies and Storage Bins
This can give customers added peace of mind knowing that every person working on their project is a paid employee of Closets by Design rather than an unknown subcontractor. Each custom closet is built in-house as well, which means customers can expect consistently high quality for all their closet projects. Closets by Design offers four distinct collections for its popular walk-in and reach-in closet systems. Closets by Design often feature a blend of open shelving, doors, and drawers to create the ideal system. Door options include flat (a smooth panel with a square edge), deco (a raised panel style), and shaker (a flat panel that features a flat wood frame). Doors can also include a glass inset that’s frosted, clear, or mirrored for an average of $300 to $2,200.
Plumb up from the bottom plates with a straight 2×4 and 4-ft. Locate the ceiling joists with a stud finder or by rapping with your knuckle, then mark them where they cross the top plate. Don’t overlook safety gear, including safety glasses and hearing protection. Depending on the complexity of the project, consider additional safety measures such as dust masks and gloves.
This DIY closet organizer is inexpensive and can be customized to fit any small closet. I’m sharing a full materials list and wood cut list, step-by-step instructions, and a video tutorial below to make it easy to create your own DIY closet organizer. Take advantage of all available space, up to the ceiling and down to the floor.
A qualified carpenter will bring your desired closet to life. With a walk-in closet, you may also need to hire an electrician after the carpenter has done their part—if you want it illuminated properly. With the first coat dry, sand off any rough spots you find on the drywall with a sanding block.
When not writing, she’s juggling kids and coffee and working on creating a home full of comfort. Be the first to know about the latest projects, plans, ideas and tips. Add baseboards to cover the bottom and add a sophisticated, finished look.
When you’re happy with the fit, add a second nail at each location and a 3-in. Screw through each of the top hinges into the door trimmer stud (Photo 12). Score the shims with a sharp utility knife and snap them off flush with the jambs. Embarking on a DIY closet project offers a multitude of benefits beyond the evident cost-effectiveness.
Drive the screw through the jamb and into the 2×4 door framing to add extra support and keep the door from sagging over time. Double-check the space between the doors and add a shim if necessary. Steal a few feet from the end of your bedroom and add a wall-to-wall closet with doors. The choice of materials significantly influences the durability, aesthetics, and overall quality of your DIY closet organizer. Optimal wood types for durability and visual appeal vary based on personal preferences and the intended style of the organizer.


No comments:
Post a Comment